Comprehensive analysis of DIY vs. commercial automatic chicken doors to help you make the right choice
Building a DIY automatic chicken door represents an appealing project for technically-minded chicken owners. However, understanding the true complexity, time investment, and hidden costs helps determine whether DIY construction or professional systems better serve your flock's needs and your long-term satisfaction.
Quick Answer: DIY Automatic Chicken Door
Building a DIY automatic chicken door requires electronics knowledge, mechanical skills, and 20-40 hours of work. Component costs range from $150-300, but reliability and features lag significantly behind commercial systems. Most DIY builders eventually upgrade to professional systems like Coop Tender for better security, convenience, and long-term reliability.
Key DIY challenges: Motor selection complexity, controller programming requirements, weatherproofing difficulties, and ongoing maintenance demands.
Understanding the DIY Automatic Chicken Door Appeal
Before diving into construction details, examining why chicken owners consider DIY projects helps set realistic expectations about what's achievable versus what sounds appealing in theory.
The Allure of DIY Projects
Cost Savings Perception: Initial analysis suggests DIY automatic chicken door construction costs significantly less than commercial alternatives. However, this calculation often overlooks tool investments, learning curve expenses, failed prototypes, and time value.
Customization Possibilities: DIY projects offer complete control over dimensions, features, and aesthetics. This flexibility appeals to owners with non-standard coop configurations or specific operational requirements commercial products don't address.
Learning and Achievement: Successfully completing a complex DIY automatic chicken door provides genuine satisfaction and valuable skills. The engineering and problem-solving challenges attract technically-minded individuals seeking fulfilling projects.
The Hidden Realities
Time Investment Underestimation: Most DIY automatic chicken door builders drastically underestimate required time. Initial estimates of "weekend projects" frequently expand into month-long efforts as unexpected challenges emerge during construction and testing.
Skill Requirements Exceed Expectations: Successful DIY automatic chicken door construction demands proficiency in woodworking, electronics, programming, and mechanical systems. Few individuals possess all necessary skills, requiring significant learning investment or collaboration.
Reliability Gaps: Homemade systems rarely match commercial reliability standards. DIY automatic chicken doors often experience weatherproofing failures, programming bugs, mechanical binding, and component degradation that professional engineering specifically addresses.
DIY Automatic Chicken Door: Complete Requirements Analysis
Understanding comprehensive requirements helps DIY builders assess whether they possess necessary capabilities and resources for successful project completion.
Technical Skills Required
Woodworking Expertise: Precision woodworking represents the foundation of functional DIY automatic chicken door construction. Tolerances matter significantly - doors that bind, leak, or misalign fail to protect chickens reliably.
Essential Woodworking Skills:
- Precision cutting: Table saw operation for consistent dimensional accuracy
- Joinery techniques: Strong, weather-resistant assembly methods
- Hardware installation: Proper mounting, alignment, and reinforcement
- Finishing application: Weatherproofing treatments and protective coatings
- Problem-solving: Adapting plans to materials and correcting construction errors
Electronics Knowledge: DIY automatic chicken door electronics demand understanding of DC circuits, microcontrollers, sensors, and power management - knowledge that requires years to develop proficiently.
Required Electronics Skills:
- Circuit design: Creating functional electronic schematics
- Component selection: Choosing appropriate parts for application requirements
- Soldering proficiency: Reliable electrical connections under field conditions
- Troubleshooting ability: Diagnosing and repairing circuit problems
- Safety awareness: Preventing short circuits, fires, and component damage
Programming Capability: Microcontroller firmware programming requires specific language knowledge (typically C or Arduino) and understanding of timing loops, sensor reading, motor control, and error handling.
Programming Requirements:
- Microcontroller platforms: Arduino, PIC, or similar embedded systems
- Code development: Writing, testing, and debugging firmware
- Sensor integration: Reading and interpreting light and temperature sensors
- Motor control: Implementing safe, reliable door operation algorithms
- Edge case handling: Programming for all possible operational scenarios
Tool and Equipment Investment
Woodworking Tools Required: Beyond basic hand tools, DIY automatic chicken door construction demands specialized equipment representing significant investment for those without existing workshops.
Essential Woodworking Equipment:
- Table saw: Quality saw costs $300-800 for adequate precision
- Drill press: Precise hole drilling requires $200-500 investment
- Measuring and marking tools: Accurate squares, levels, and marking equipment
- Clamps and assembly aids: Proper glue-ups demand multiple quality clamps
- Safety equipment: Eye protection, hearing protection, dust collection
Electronics Development Tools: Electronics prototyping and testing require specialized equipment beyond basic multimeters and soldering irons.
Electronics Tool Investment:
- Breadboard and components: $50-100 for prototyping supplies
- Microcontroller programmer: $30-100 depending on platform
- Power supplies: Regulated power for testing requires $50-150
- Oscilloscope (optional): Professional debugging benefits from $200-500 investment
- Component storage: Organization systems for hundreds of small parts
Total Tool Investment: DIY automatic chicken door construction requires $500-1,500 in tools for those starting without adequate equipment. This investment often exceeds the cost difference between DIY and commercial systems.
Material and Component Costs
Lumber and Construction Materials: Quality materials ensure durability and weather resistance critical for outdoor automation systems.
Wood and Hardware Costs:
- Dimensional lumber: $40-60 for select-grade materials
- Stainless steel hardware: $20-40 for screws, hinges, brackets
- Weatherproofing materials: $30-50 for sealants, treatments, finishes
- Door track components: $20-40 for guides and mounting hardware
Electronics Components: Electronic components represent significant DIY automatic chicken door expense, especially when accounting for prototyping failures and component burnout during development.
Electronics Budget:
- Microcontroller and support components: $30-60 for processor, regulators, interfaces
- Motor and drive mechanism: $40-80 for quality gear motor and threaded rod
- Sensors and switches: $20-40 for light sensors, limit switches, temperature probes
- Power management: $30-60 for battery charging and voltage regulation
- Enclosure and connections: $20-40 for weatherproof housing and connectors
- Prototyping and failures: $50-100 for testing, failed components, redesigns
Total Material Investment: Realistic DIY automatic chicken door material costs range from $250-400, assuming no major mistakes requiring component replacement or redesign.
DIY Automatic Chicken Door: Time Investment Reality
Understanding true time requirements helps DIY builders assess whether project timelines align with available hours and patience levels.
Design and Planning Phase
Research and Design: 8-15 hours
- Reviewing existing designs and approaches
- Creating customized plans for specific coop configuration
- Sourcing components and materials
- Creating cutting lists and assembly sequences
Skill Development: 10-30 hours
- Learning Arduino programming or microcontroller development
- Studying electronics fundamentals and circuit design
- Practicing woodworking techniques on scrap materials
- Understanding motor control and sensor integration
Construction Phase
Woodworking Assembly: 12-20 hours
- Cutting and preparing lumber components
- Assembling door frame and housing structures
- Installing mechanical components and hardware
- Applying weatherproofing treatments and finishes
- Correcting mistakes and fitting adjustments
Electronics Development: 15-25 hours
- Breadboard prototyping and testing
- PCB design or perfboard assembly
- Component soldering and circuit construction
- Initial testing and troubleshooting
- Enclosure installation and wire routing
Programming and Testing: 10-20 hours
- Writing and debugging microcontroller firmware
- Sensor calibration and motor control tuning
- Safety feature implementation and testing
- Edge case scenario programming
- Field testing and refinement
Debugging and Refinement
Problem Resolution: 15-30 hours
- Weatherproofing issues and corrections
- Mechanical binding diagnosis and fixes
- Electronic failure troubleshooting and repair
- Software bug identification and resolution
- Performance optimization and tuning
Total Time Investment: 70-140 hours Most DIY automatic chicken door projects require 80-120 hours from planning through reliable operation. This represents 2-3 weeks of full-time work or 3-6 months of weekend project time.
Time Value Calculation: At $20/hour (conservative skilled labor rate), DIY time investment represents $1,400-2,400 in equivalent labor cost - significantly exceeding commercial system prices.
DIY vs. Commercial Automatic Chicken Door: Feature Comparison
Objective comparison reveals significant capability gaps between homemade and professional systems that affect long-term satisfaction and reliability.
Reliability and Durability
| Feature | DIY System | Commercial (Coop Tender) |
|---|---|---|
| Design Life | 2-5 years typical | 10-15 years proven |
| Weather Rating | Variable, often inadequate | -20°F to 185°F certified |
| Component Quality | Consumer-grade parts | Industrial-grade components |
| Engineering Testing | None - prototype only | Extensive field validation |
| Failure Rate | 15-30% within first year | <5% over 10 years |
| Warranty Coverage | None | 3-year comprehensive |
Feature Capabilities
| Capability | DIY System | Commercial (Coop Tender) |
|---|---|---|
| Dawn/Dusk Operation | Basic, if programmed | Precision auto-adjustment |
| WiFi Connectivity | Very complex to implement | Professional IoT infrastructure |
| Remote Monitoring | Requires significant coding | Universal web app included |
| SMS/Email Alerts | Nearly impossible for DIYers | Standard feature |
| Freeze Protection | Must program yourself | Intelligent temperature management |
| Battery Management | Basic charging only | MPPT optimization |
Security and Safety
| Security Aspect | DIY System | Commercial (Coop Tender) |
|---|---|---|
| Predator Resistance | Depends on design quality | Steel worm drive - predator proof |
| Obstruction Detection | Difficult to implement | Automatic safety features |
| Manual Override | Must design and build | Professional emergency controls |
| Fail-Safe Operation | Requires careful programming | Multiple redundant safeguards |
| Lock Strength | Variable, often weak | Self-locking mechanical design |
When DIY Makes Sense (Honest Assessment)
Despite challenges, certain situations justify DIY automatic chicken door construction for specific individuals with particular circumstances and capabilities.
Ideal DIY Candidate Profile
You Should Consider DIY If:
- ✅ You possess genuine expertise in electronics AND woodworking AND programming
- ✅ You own necessary tools and workshop equipment already
- ✅ You genuinely enjoy complex technical projects for their own sake
- ✅ You have 100+ hours available for this single project
- ✅ You want a learning experience more than a reliable product
- ✅ You have unique requirements commercial products cannot address
- ✅ You can afford project failure without affecting flock safety
Red Flags Suggesting Commercial Systems:
- ❌ Limited technical experience in any required skill area
- ❌ Need reliable operation for valuable or beloved flock
- ❌ Want professional support and warranty protection
- ❌ Value your time at $15+ per hour
- ❌ Lack adequate workshop space and tools
- ❌ Want features like WiFi connectivity and remote monitoring
- ❌ Need solution quickly rather than multi-month project
Commercial System Advantages: Why Most Builders Eventually Upgrade
Understanding why experienced DIY builders often replace homemade systems with commercial alternatives provides valuable perspective for initial decision-making.
Engineering Excellence
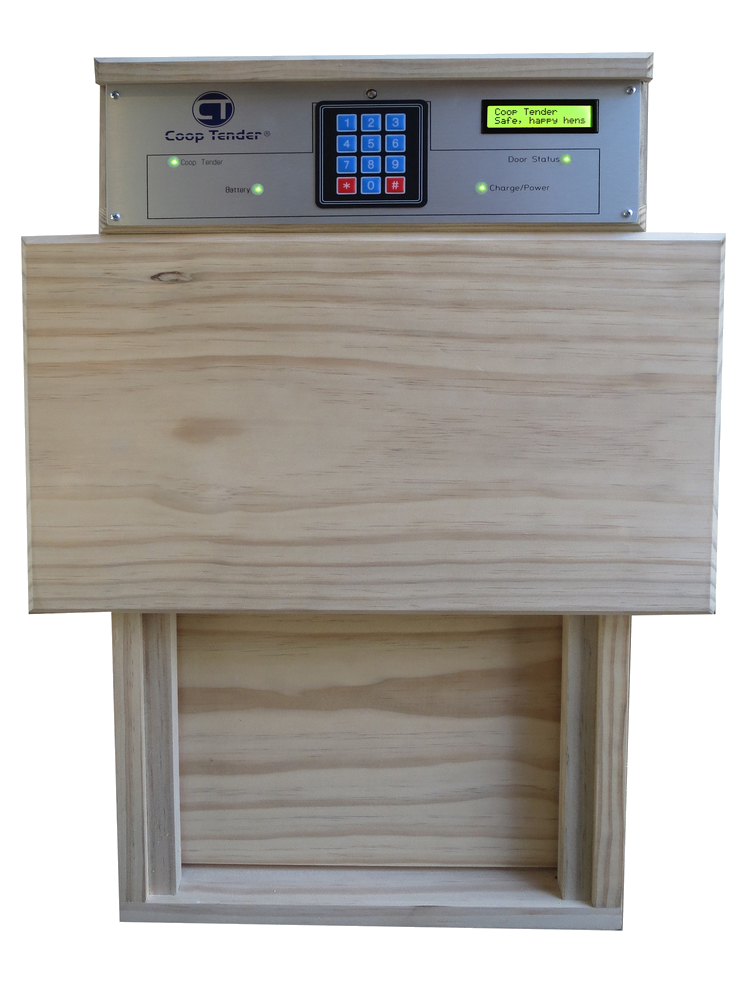
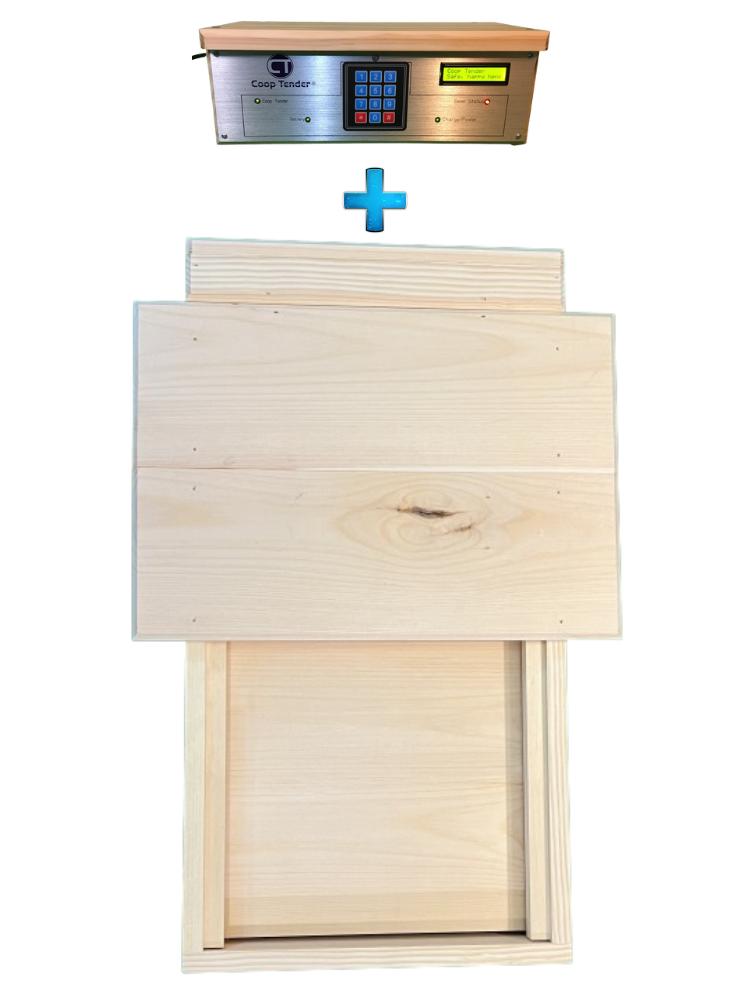
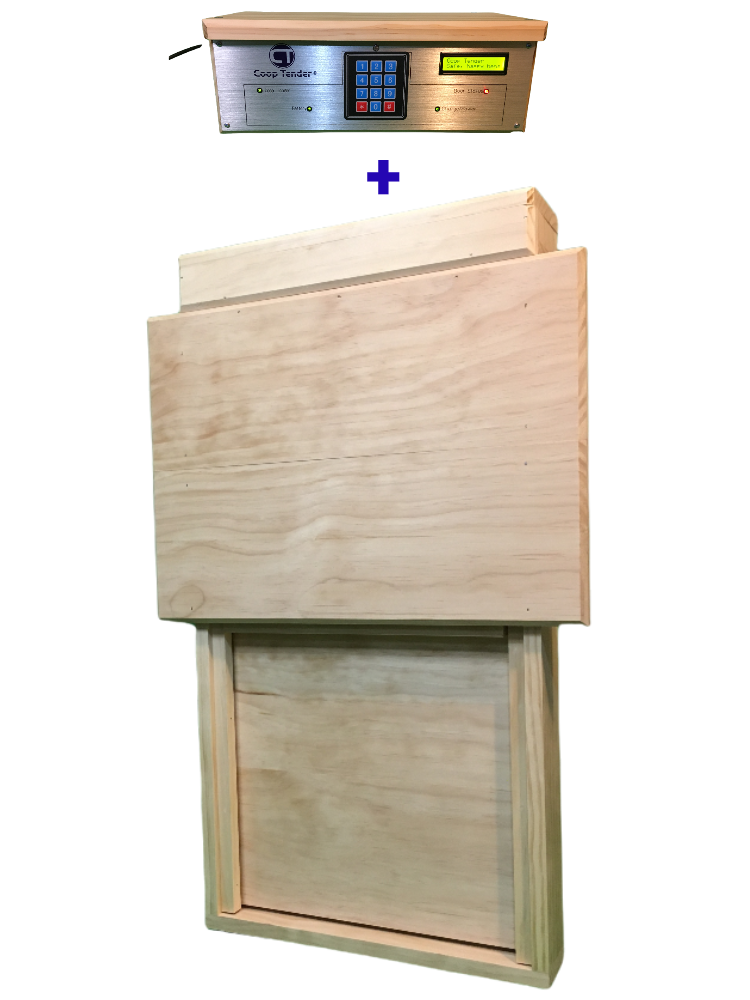
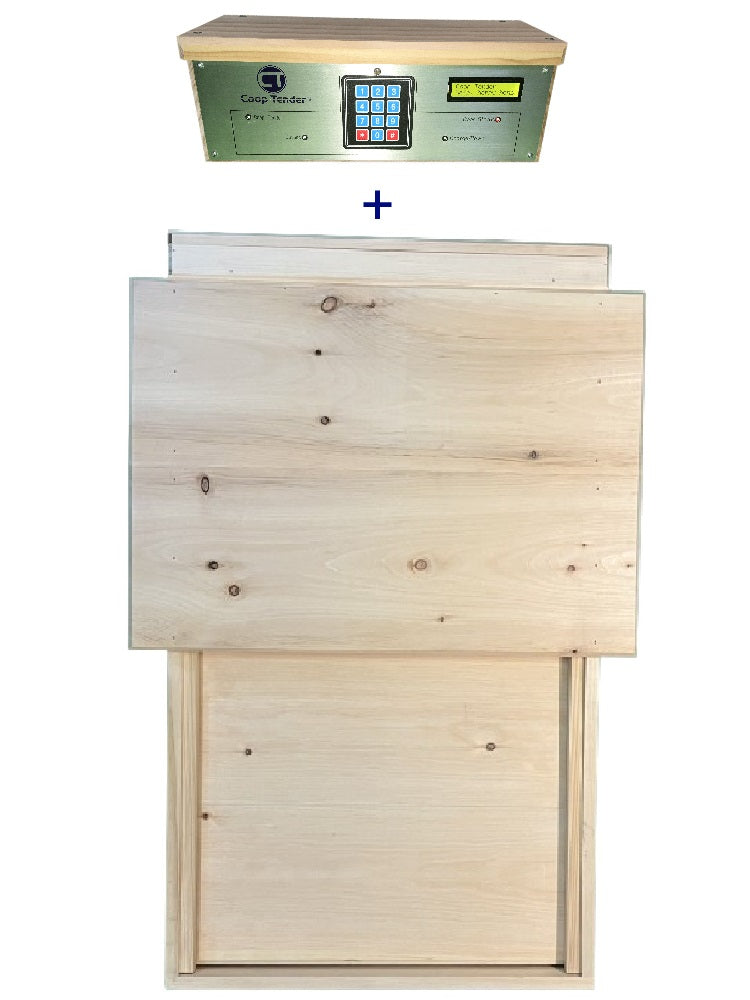
Professional Design Benefits: Coop Tender automatic chicken doors represent over 10 years of engineering refinement, field testing, and continuous improvement that individual DIYers cannot replicate.
Proven Reliability:
- Field-tested durability: 10+ years of real-world operation data
- Material optimization: Component selection based on extensive failure analysis
- Weather resistance: Professional sealing and protection exceeding amateur capabilities
- Consistent performance: Manufacturing quality control ensures every unit meets standards
Steel Worm Drive Superiority
Mechanical Security: The self-locking steel worm drive mechanism represents the critical difference between DIY systems and professional protection.
Worm Drive Advantages:
- Predator-proof operation: Physically impossible for animals to force open
- Single moving part: Eliminates multiple failure points common in DIY designs
- Precision machining: Custom-manufactured components ensure smooth operation
- Maintenance-free: Sealed bearing design requires minimal service attention
Professional IoT Integration
Connected System Benefits: True internet connectivity with professional infrastructure provides capabilities beyond DIY implementation scope.
Coop Tender Universal Web App:
- No app downloads: Browser-based works on any device globally
- Enterprise infrastructure: 99.9% uptime with redundant servers
- Professional monitoring: Real-time alerts and status tracking
- Firmware updates: Remote improvements and feature additions
- Technical support: Expert assistance from system designers
The Hidden Costs of DIY Failure
Project failure represents more than wasted time and materials - understanding potential consequences helps inform realistic decision-making.
Financial Impact
Direct Failure Costs:
- Lost materials: $250-400 in components become scrap
- Tool depreciation: Equipment purchased specifically for project
- Replacement system: Commercial system purchase still necessary
- Lost chickens: Predator losses during system failure periods
Indirect Financial Costs:
- Lost productivity: 100+ hours that could have generated income
- Opportunity costs: Other projects and activities foregone
- Stress impacts: Mental energy and frustration affecting other areas
- Relationship strain: Project consuming family time and resources
Chicken Safety Risks
Protection Failures: Unreliable DIY automatic chicken door systems create genuine safety hazards that affect living creatures depending on consistent protection.
Failure Scenarios:
- Weatherproofing failures: Electronics exposure causing system shutdown
- Programming bugs: Door opening or closing at wrong times
- Mechanical binding: Ice or debris preventing operation
- Power management issues: Battery depletion leaving chickens vulnerable
Frequently Asked Questions: DIY Automatic Chicken Doors
Is building a DIY automatic chicken door worth it?
For most chicken owners, no - DIY automatic chicken doors cost $250-400 in materials plus 80-120 hours of skilled labor. Commercial systems offer superior reliability, features, and warranty protection at comparable or lower total cost when time value is considered.
What skills do I need to build a DIY automatic chicken door?
Successful DIY automatic chicken door construction requires proficiency in precision woodworking, electronics circuit design, microcontroller programming, and mechanical system integration. Few individuals possess all necessary skills without significant learning investment.
How long does it take to build a DIY automatic chicken door?
Realistic DIY automatic chicken door construction requires 80-120 hours from planning through reliable operation. This represents 2-3 weeks of full-time work or 3-6 months of weekend projects, assuming you possess necessary skills.
Can DIY automatic chicken doors match commercial reliability?
No - homemade systems rarely achieve commercial reliability standards. DIY automatic chicken doors typically experience 15-30% failure rates within the first year versus less than 5% for professional systems over 10 years of operation.
What's the biggest challenge in building a DIY automatic chicken door?
The biggest challenge is reliable weatherproofing of electronic components. Most DIY automatic chicken door failures result from moisture intrusion, temperature extremes, or inadequate sealing that professional engineering specifically addresses.
Should I buy commercial or build my own automatic chicken door?
Most chicken owners should purchase commercial systems. DIY makes sense only for individuals with genuine expertise in all required skills, adequate tools and workspace, 100+ hours available, and who prioritize learning experience over reliable protection.
Can I save money building my own automatic chicken door?
Only if you value your time at $0/hour and already own all necessary tools. DIY automatic chicken door material costs ($250-400) plus tool investment ($500-1,500 for new builders) plus time value (80-120 hours) typically exceeds commercial system prices.
What features can't DIY automatic chicken doors easily replicate?
DIY builders struggle to implement WiFi connectivity, remote monitoring, SMS alerts, professional IoT infrastructure, steel worm drive security, and comprehensive safety features that commercial systems provide as standard capabilities.
The Better Path: Professional Systems That Just Work
After examining DIY automatic chicken door requirements, costs, and challenges, most chicken owners recognize that professional systems provide superior value through proven reliability, advanced features, and comprehensive support.
Coop Tender Advantage
10+ Years of Engineering Refinement: Every Coop Tender automatic chicken door incorporates a decade of continuous improvement, field testing, and customer feedback that individual DIYers cannot replicate in single projects.
Made-to-Order American Quality: Each door is precision-manufactured by hand in our USA facility using traditional craftsmanship and modern engineering excellence. Your door begins production immediately after ordering, ensuring you receive the latest improvements and highest quality components.
Comprehensive Feature Set:
- Steel worm drive mechanism: Predator-proof security
- WiFi connectivity: Universal web app control
- Solar + electric options: Reliable power anywhere
- Freeze protection: Intelligent temperature management
- 3-year warranty: Industry-leading coverage
- Expert support: Assistance from system designers
Investment Comparison
DIY Total Cost:
- Materials: $250-400
- Tools (if needed): $500-1,500
- Time value (80-120 hours × $20/hour): $1,600-2,400
- Total: $2,350-4,300
Coop Tender Commercial System:
- Complete door system: $399-599
- Installation time: 2-4 hours
- Warranty and support: Included
- Proven reliability: 10+ years
- Total: $399-599
Real Customer Experiences
"I spent three months building a DIY door that worked for six weeks before weatherproofing failed. Bought a Coop Tender and haven't thought about it since - three years of perfect operation." - Mike R., Montana
"As an engineer, I appreciated the DIY challenge. But after two failed prototypes, I realized professional systems incorporate years of refinement I couldn't match. Coop Tender was the right choice from the start." - Jennifer L., Texas
Conclusion: Making the Right Decision for Your Flock
DIY automatic chicken door construction appeals to technically-minded chicken owners seeking challenging projects and customization opportunities. However, realistic assessment of required skills, time investment, material costs, and reliability expectations reveals that commercial systems provide superior value for most situations.
Choose DIY If:
- You genuinely possess all required technical skills
- You prioritize learning experience over reliable results
- You have 100+ available hours for this single project
- You accept responsibility for potential failures affecting your flock
- You own necessary tools and adequate workspace
Choose Commercial Systems If:
- You want proven reliability and comprehensive warranty protection
- You value your time and want professional-grade features
- Your flock's safety is non-negotiable priority
- You prefer systems backed by years of engineering refinement
- You want WiFi connectivity, remote monitoring, and expert support
For most chicken owners, professional systems like Coop Tender provide the reliability, features, and peace of mind that DIY projects struggle to match.
Ready to explore professional automatic door systems that provide worry-free protection for your flock? Learn more about Coop Tender's complete line of steel worm drive automatic doors designed and manufactured in America with industry-leading 3-year warranty coverage.
Still Determined to Build Your Own?
If after understanding the complexity, time investment, and costs you remain committed to DIY construction, we respect that dedication and want to support your success.
Advanced Technical Resources:
For those with genuine electronics expertise and adequate time, we provide comprehensive technical documentation:
→ Read Part 2: DIY Automatic Chicken Door Electronics Guide
This advanced guide includes schematics, PCB designs, component lists, and firmware considerations for experienced electronics builders.
DIY Component Support:
We offer individual components and sub-assemblies for DIY builders:
- Pre-assembled and tested control panels
- Motor and drive shaft assemblies
- Electronic components and parts
- Technical support for component integration
Building your own teaches valuable skills. We're here to help whether you build or buy.
Your chickens deserve reliable protection. Whether you build or buy, ensure your chosen solution provides the security and convenience your flock needs year-round.


Leave a comment